- Installation of “The Travel Button” plugin
- Tracking code set up
- Styles
- Travel Button on WordPress
- How to use The Travel Button® in your posts
- Important information
- How to prevent the buttons from showing on your WordPress homepage
- Security
Installation of “The Travel Button” plugin
To make your life easier we have designed a WordPress plugin with which you can manage The Travel Button®. With an intuitive and user-friendly interface, our plugin will help you create and keep tabs on The Travel Button®.
The Travel Button® is the widget that allows your audience to access Travelfinder®, your travel metasearch engine, easily and without leaving your website.
First, you need to download and install the plugin. On your WordPress dashboard click the ‘Plugins’ tab and select ‘Add New’.

- Plugins > Add New > search plugins.
- Type “The Travel Button” on the search bar at the top right corner of the page.
- Install and then activate the plugin.
Once the plugin has been successfully installed and activated, you’ll see a new tab, called ‘The Travel Button’, on your WordPress dashboard menu.
Setting up The Travel Button® with our plugin is remarkably simple. You just need to customize a style, i.e., the appearance and position of the button, and while configuring your first button, link the style to a destination.
Follow the steps below to create your first style and your first button.
Tracking code set up
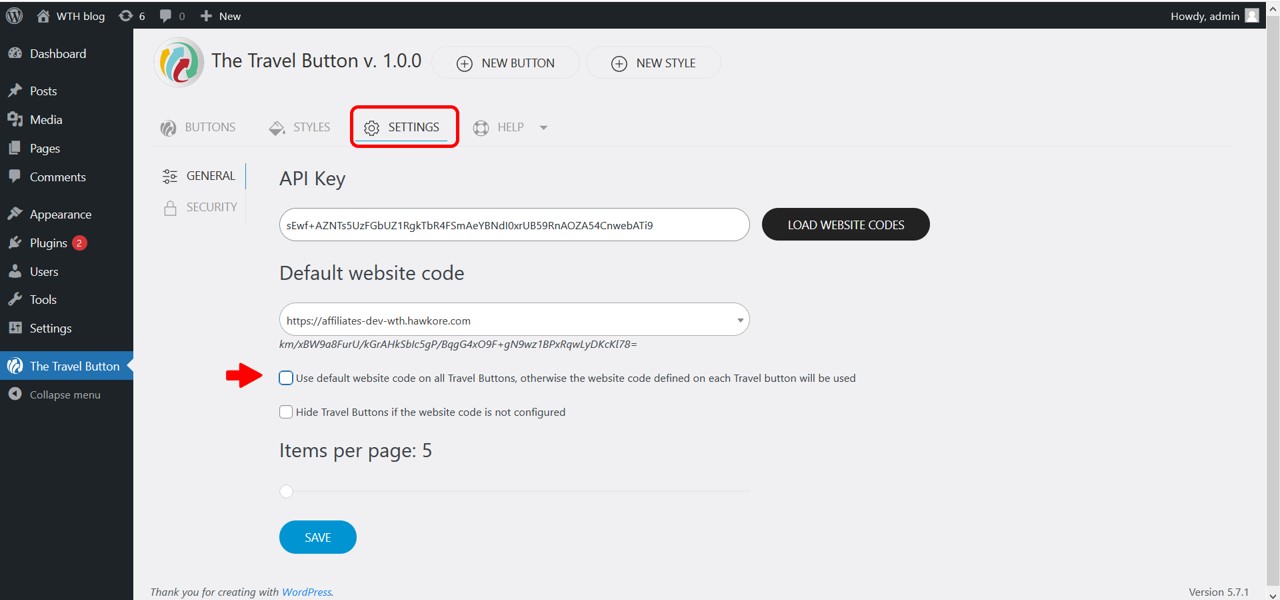
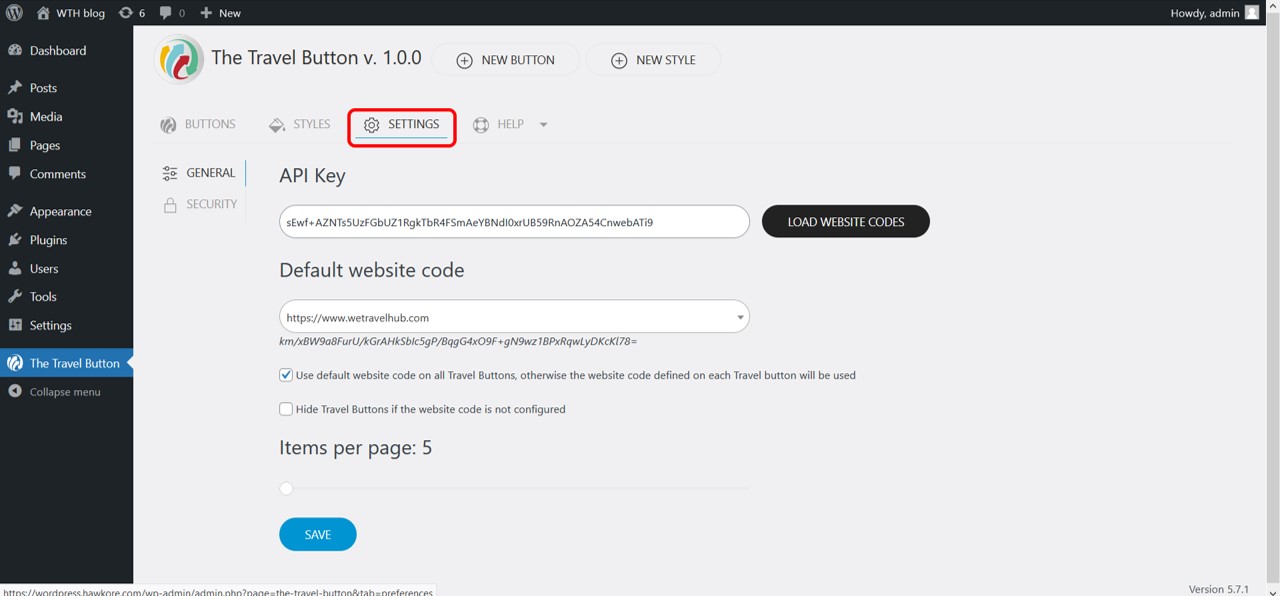
Once you have registered in We Travel Hub, you will have an API Key with which you can upload your list of tracking codes.
To retrieve the API Key, access the security tab of your account.

The tracking code is necessary for us to be able to assign the commissions generated with your Travel Button®.
You must enter the API Key of your We Travel Hub account in the settings tab > general, to set up a default tracking code.

In case you have several tracking codes, you can associate the codes with individual buttons during the customization process.
If the tracking code field doesn’t appear on the customization menu, you need to change your settings.
Click ‘setting’ and on the ‘general’ tab remove the ‘use default tracking code’ option. This will allow you to add specific tracking codes to your buttons.
Styles
By configuring different styles, you can establish different appearances, sizes, and positions for your buttons. Save your styles and reuse them as many times as you want to create different buttons, associated with the locations mentioned in your posts.
With predefined styles you save time when creating new buttons. Plus, if you change your mind and want to alter the button’s appearance, you can simply change the style. You won’t have to update your posts. Once a style is changed the plugin will make sure the buttons are updated as well.
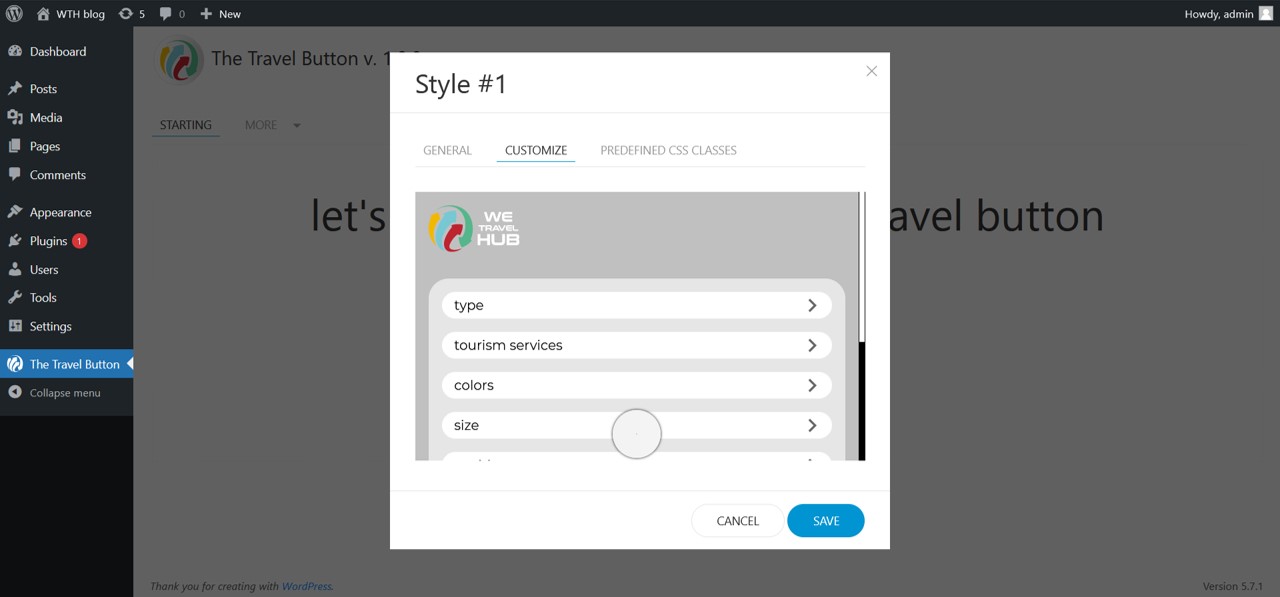
With our styles menu you can choose:
- Type of button.
- The tourism services you want to offer your visitors.
- Button colors.
- Button size.
- The position of the button within your pages; fixed (wherever you place it) or floating.
Create a style:
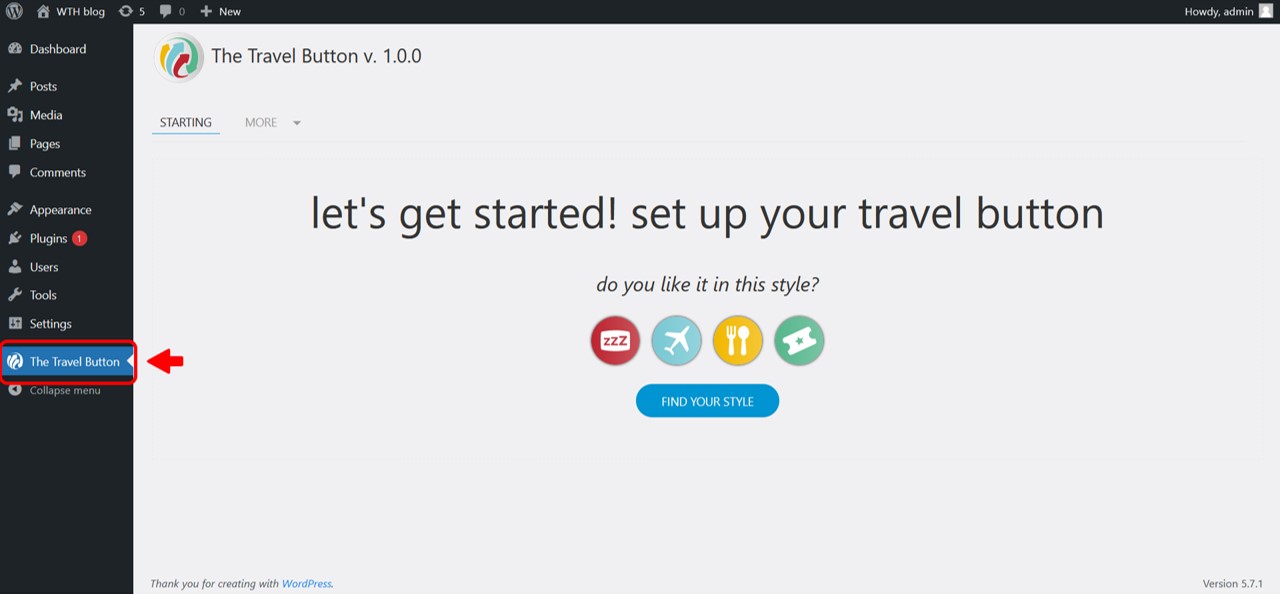
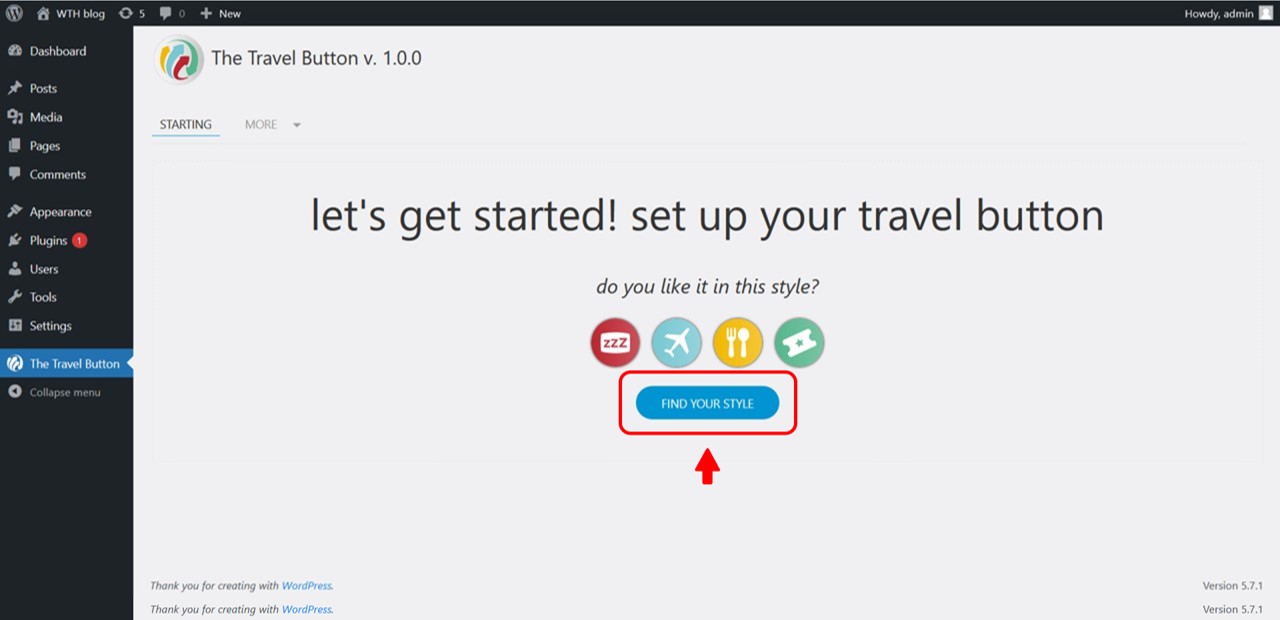
- If you have just installed the plugin, click on the ‘The Travel Button’ tab in your WordPress dashboard menu. Then, click on the ‘find your style’ button.
- In case you’ve already configured other styles, click on ‘new style’ at the top of your screen to add a new one.
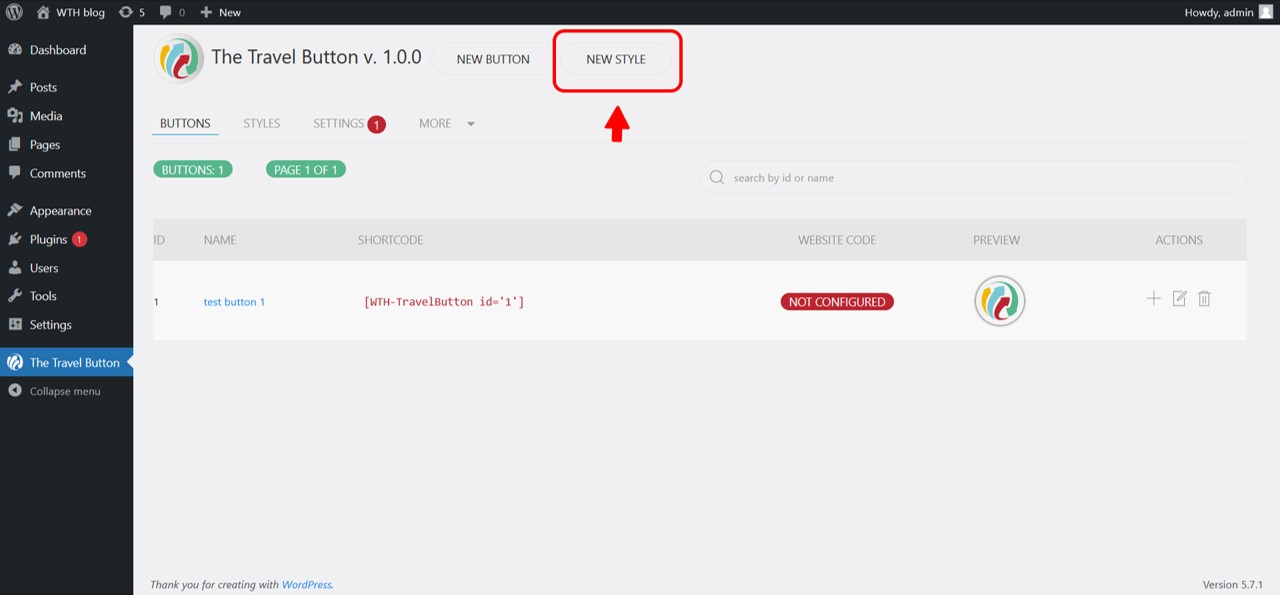
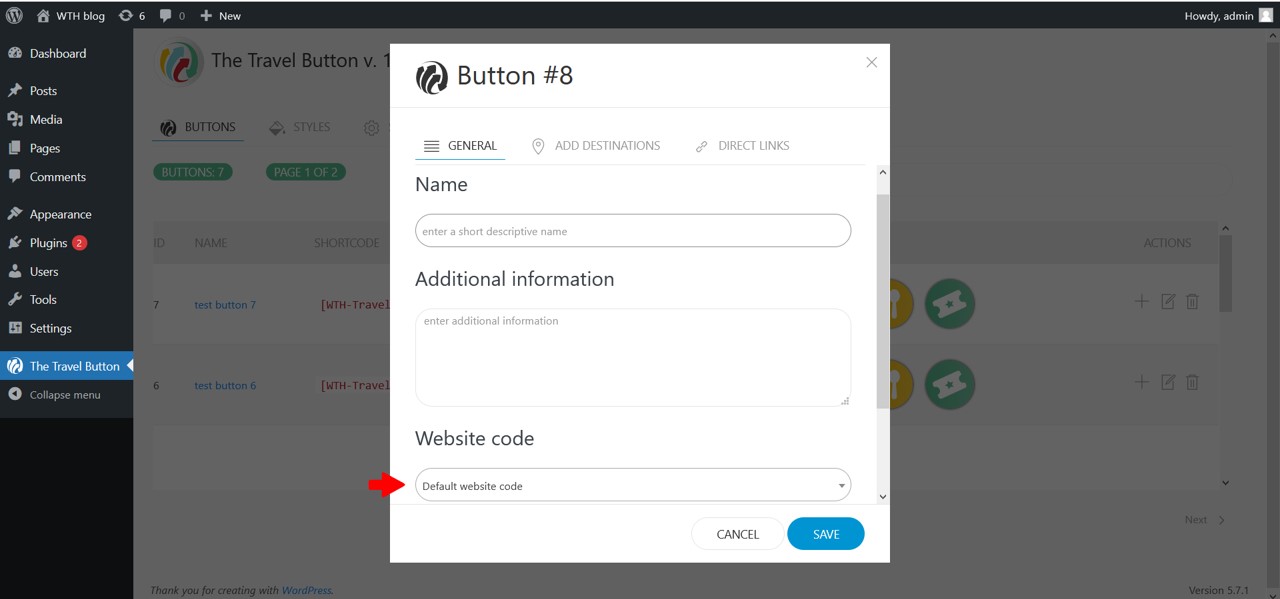
- Enter a descriptive name that identifies your new style and additional information that you consider relevant.

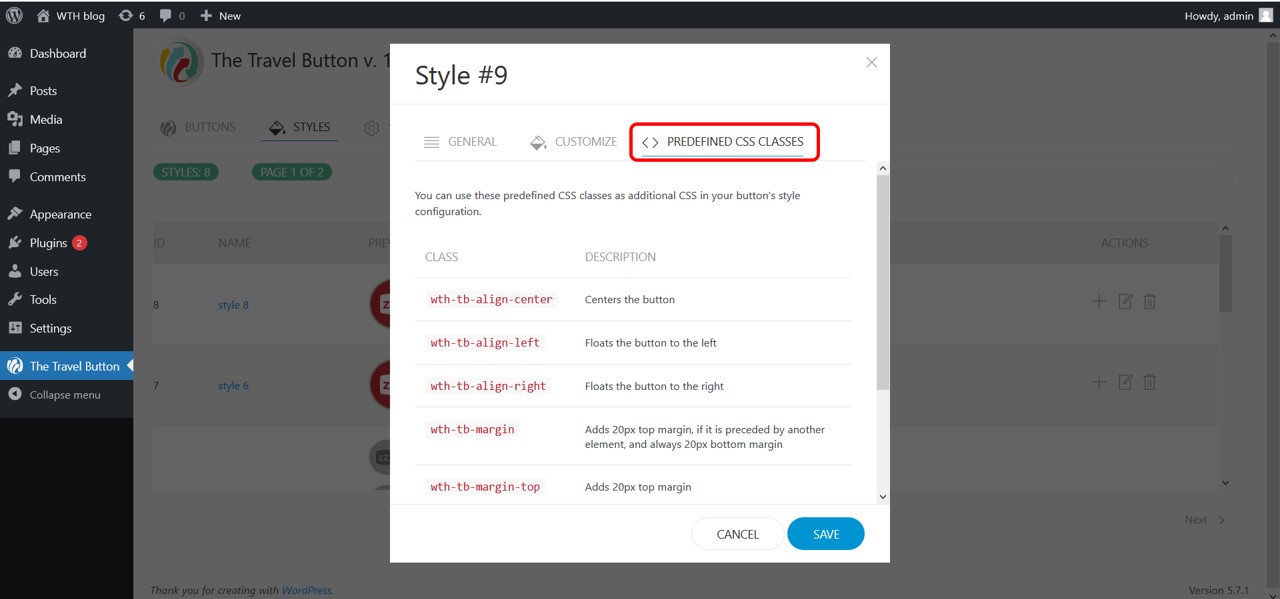
- Click ‘customize’ and use the different options to create the perfect style for your webpage. The button’s position can be defined using our editor, but some options (e.g., centering the button) are only available if you add CSS classes in the general tab (the previous screen).
- To help you position the button we have left some predefined CSS classes in the corresponding tab in the style editor.
- Once you’ve finished, click ‘save’.
Travel Button on WordPress
You can create as many buttons as you want, paired with your styles and linked to the places mentioned in your posts.
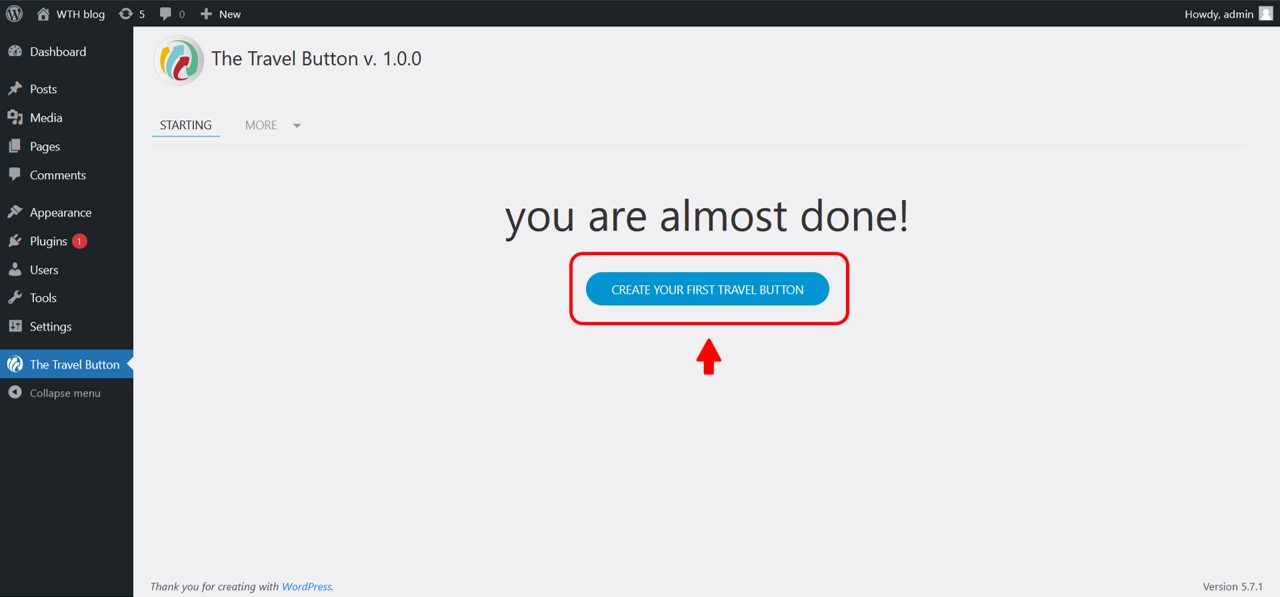
- Once you have created your first style you can use it to customize a button, associated with a specific location. To do this, click on ‘create your first button’.
- If you wish to add more buttons to your library, click ‘new button’ at the top of your screen.
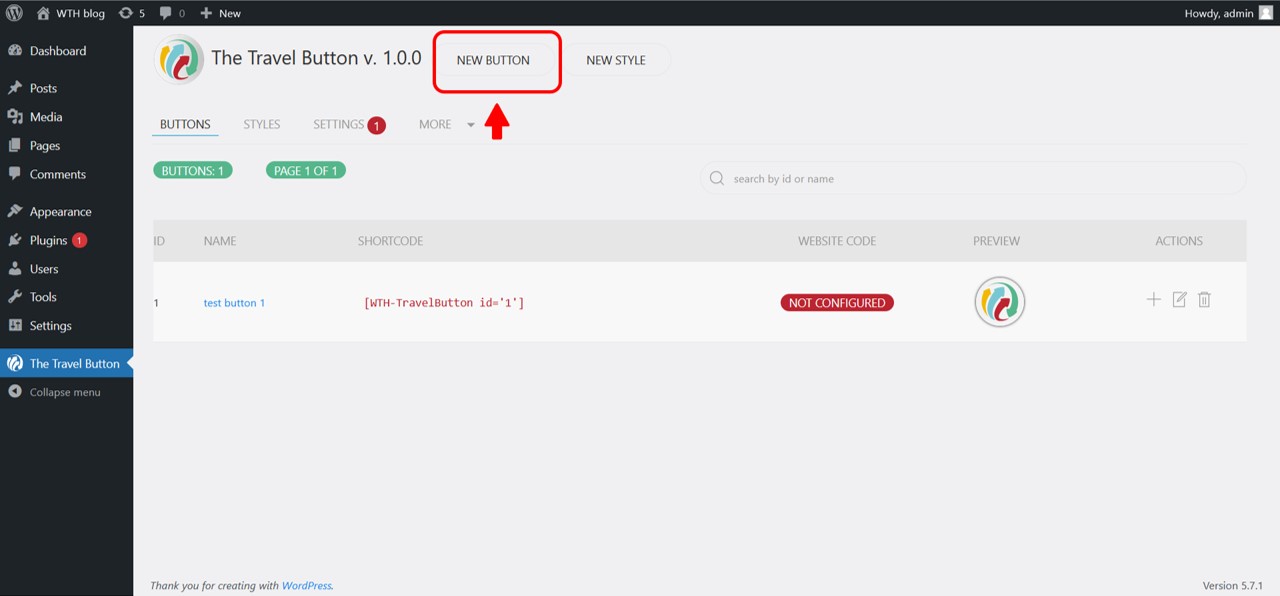
- Name your button and select the style.

- Link it to the destination you mention in your post.
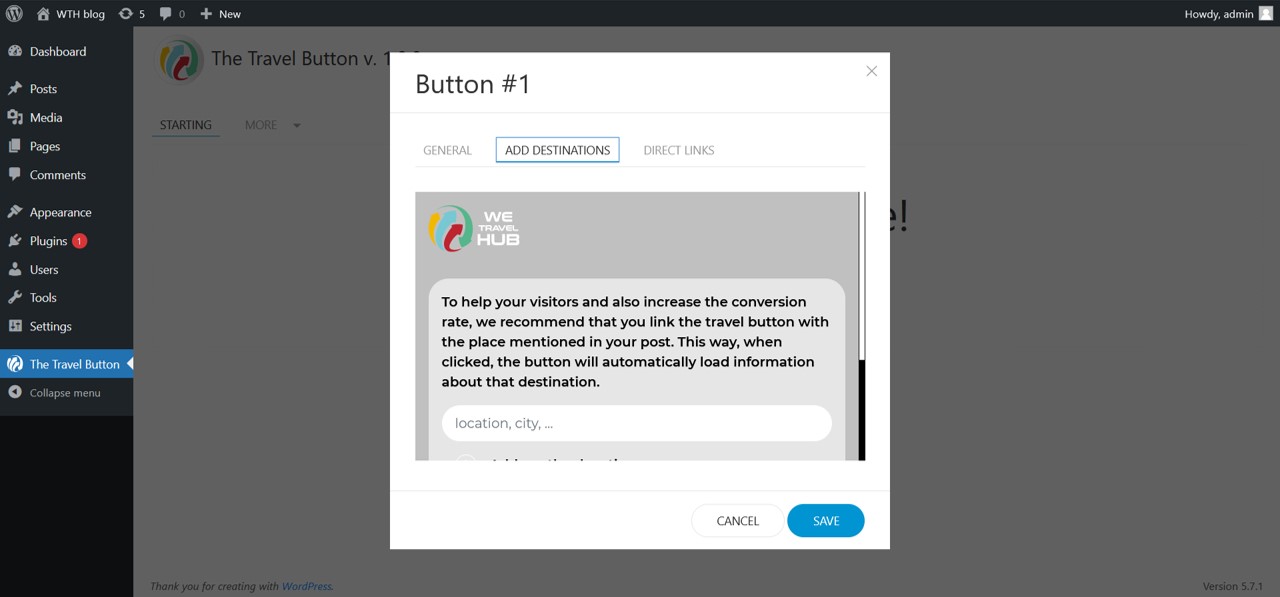
- Once you’ve finished your button’s configuration, click ‘save’.
Now you can place the button in your posts by adding the shortcode to a dedicated shortcode block on the WordPress editor.

How to use The Travel Button® in your posts
Once you have created your first travel button, follow these steps to install it on your website:
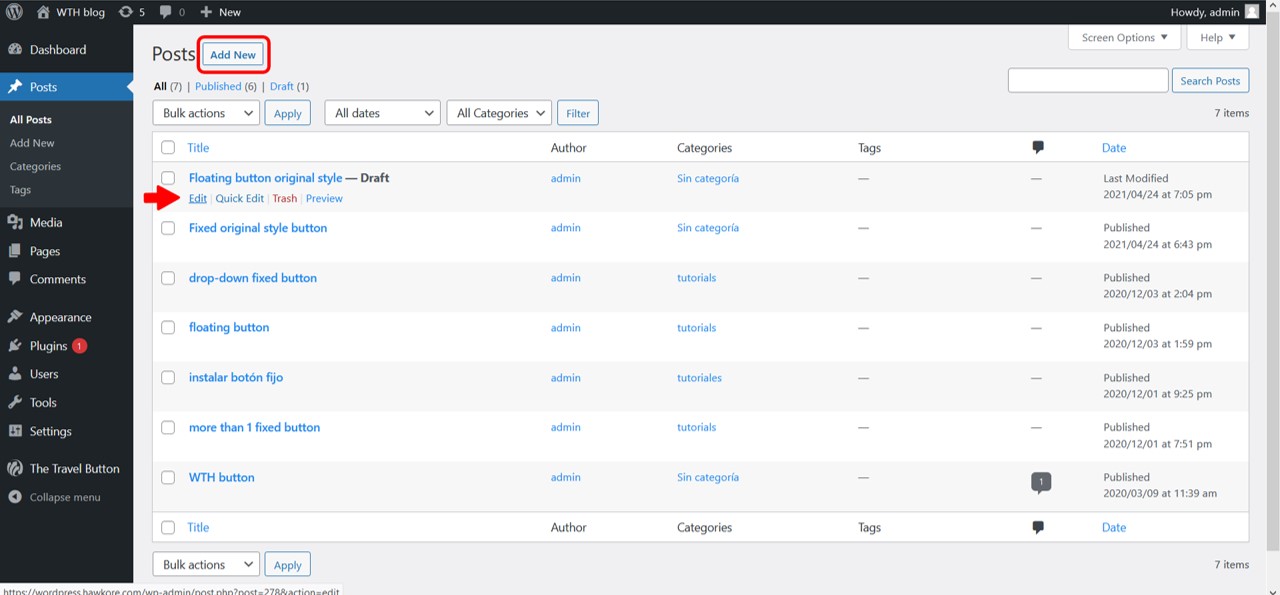
1) On your WordPress dashboard click the ‘Posts’ tab.
2) You can click ‘Add New’ and install The Travel Button® while posting new content, or you can install it on an older post. To do this, hover the cursor over the title of the published post and click ‘edit’.
3) To install The Travel Button®, you need to add a shortcode block to your text editor.
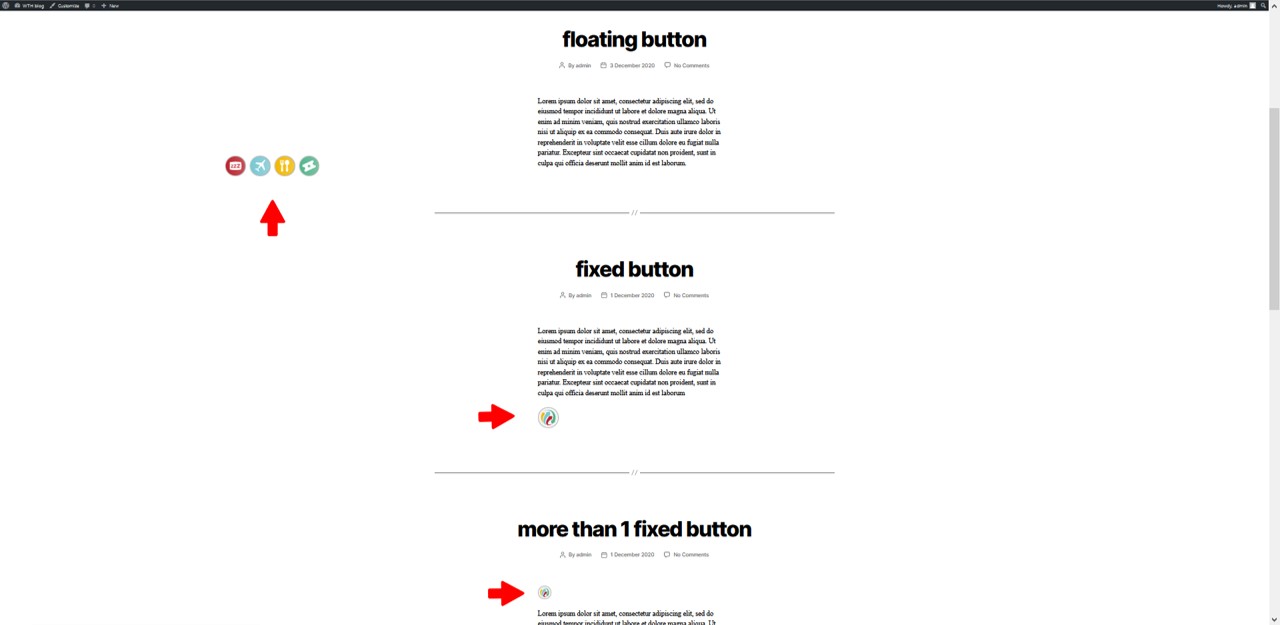
For a fixed button, you must add the shortcode block where you want the button to appear; at the beginning of your text, at the end, or even between paragraphs.
If you’ve created a floating button, add the shortcode wherever you want, its location does not influence the final result.
4) Place the cursor on the new block and a black + icon will appear. Click the icon and a pop-up window will open.

5) Type ‘short’ in the search bar and click the ‘shortcode’ button
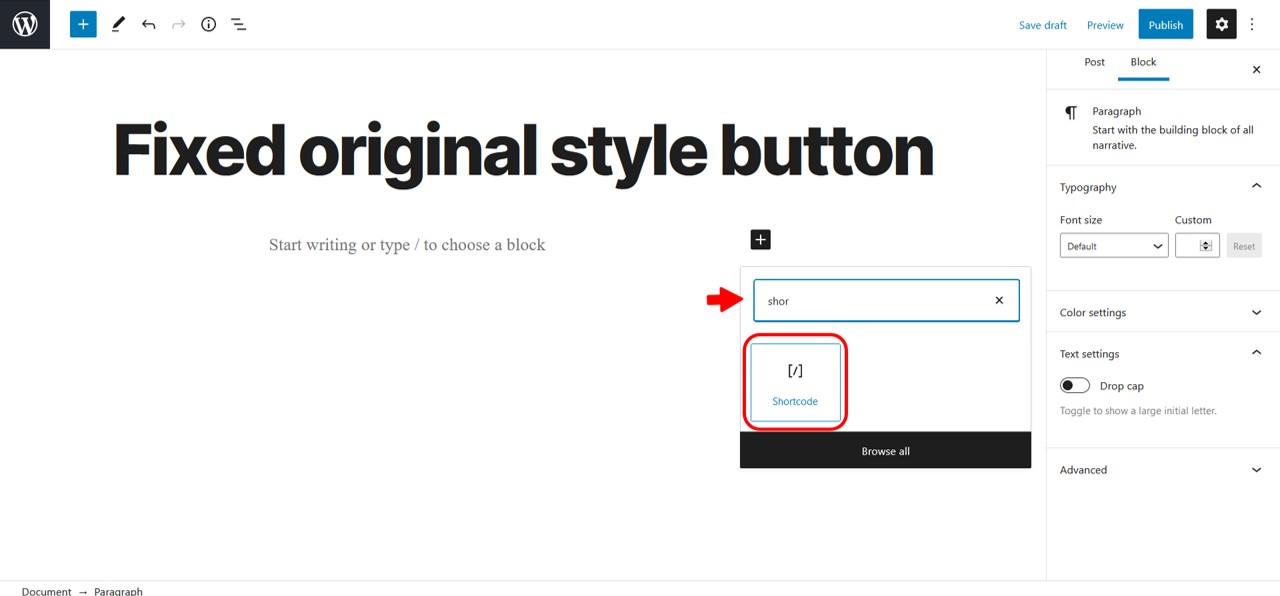
6) A shortcode block will appear in the editor.
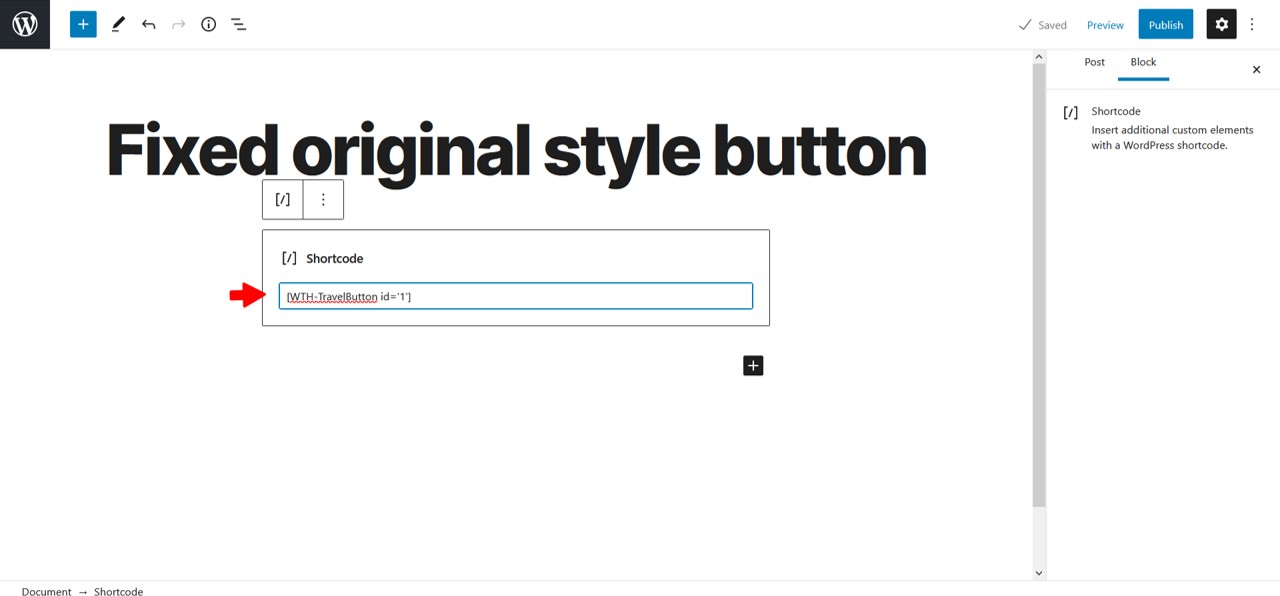
7) Go back to the plugin menu and copy the shortcode of the button you want to install.
8) Paste the shortcode into the dedicated block in your WordPress editor.
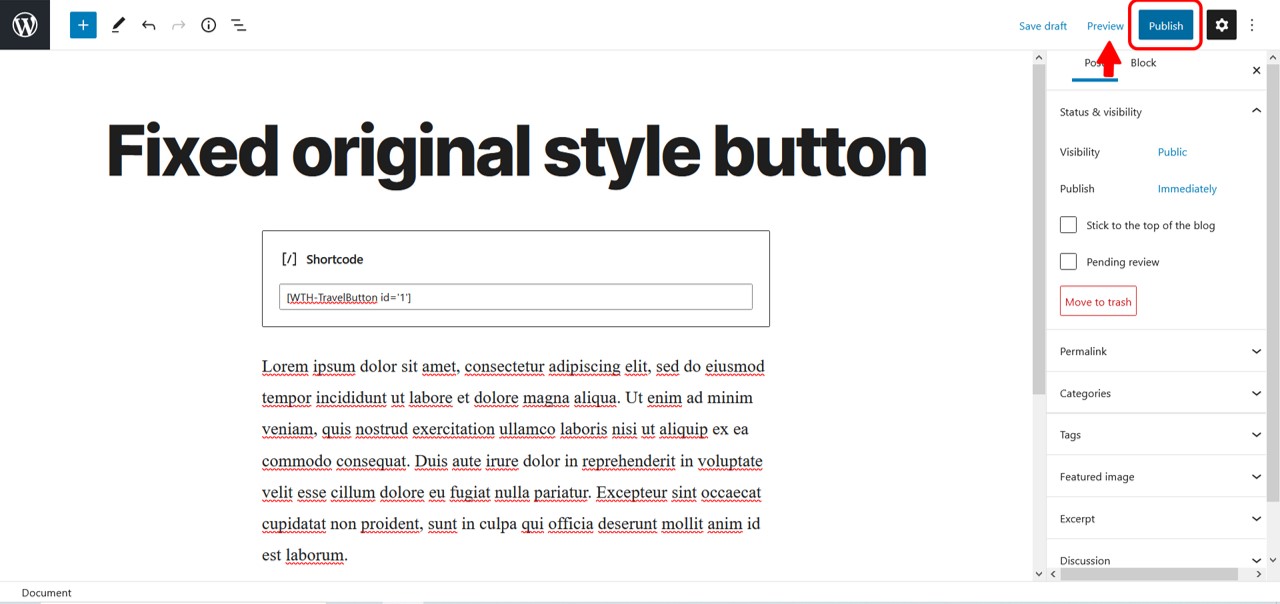
9) If you are working on a post that has already been published, click ‘Update’, in the upper right corner of your screen. On a new entry, the same button will say ‘Publish’. In either case, before you give your approval, you can check your button by clicking ‘Preview’.
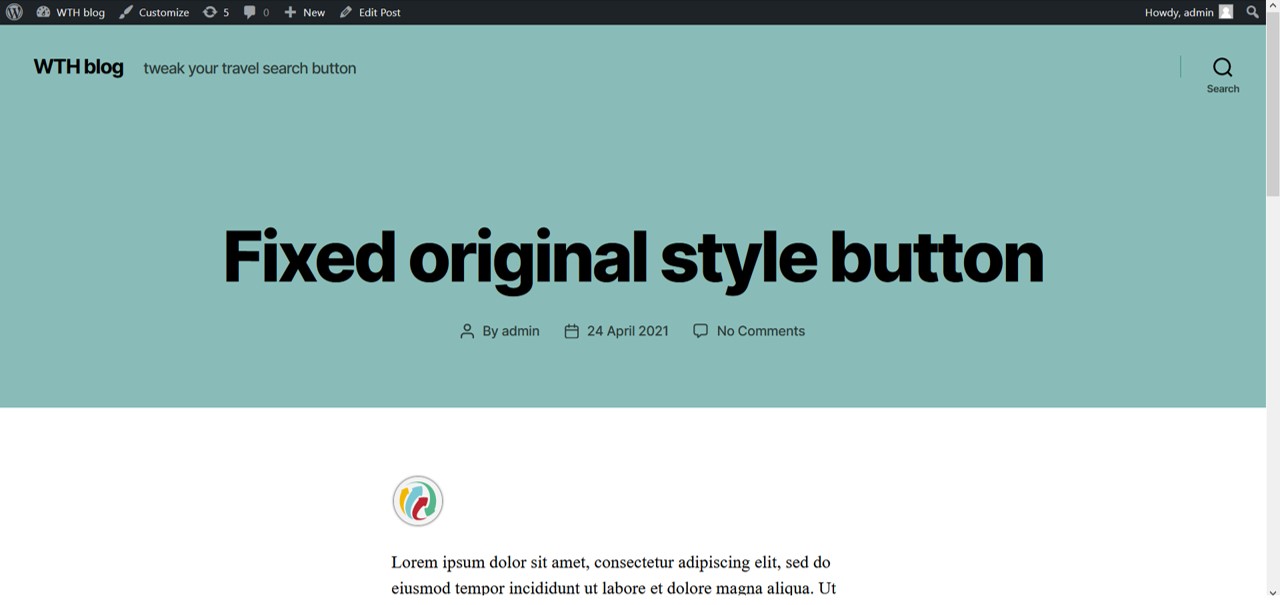
Ta-da! Here’s the result.
Important information
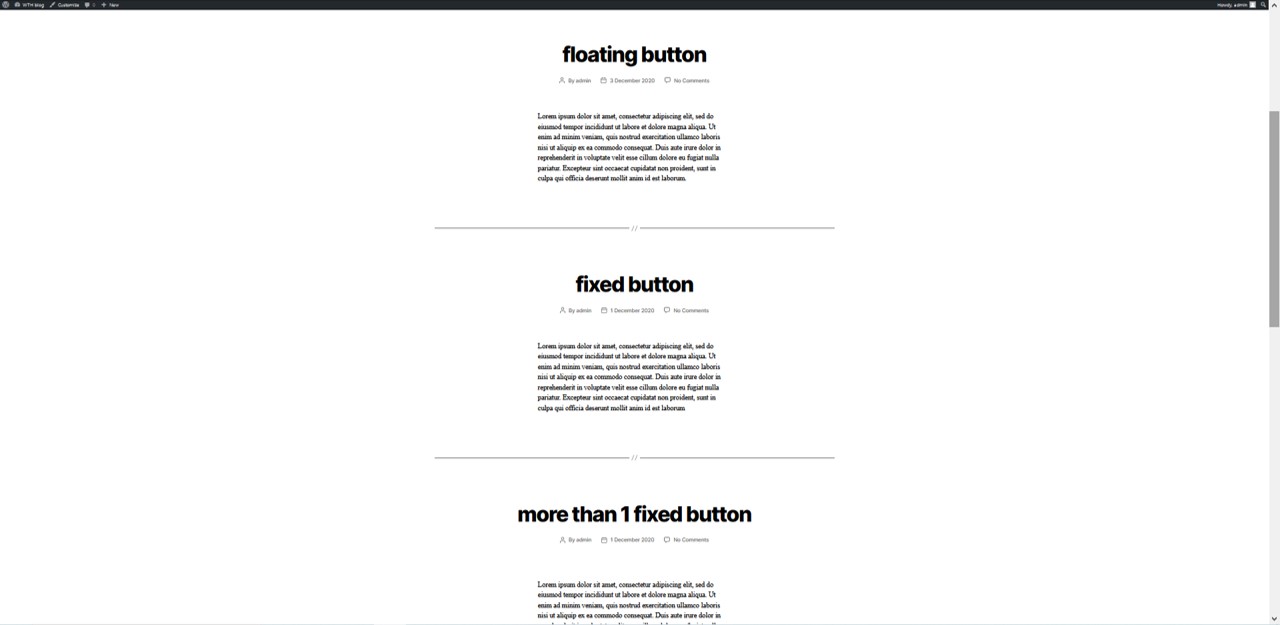
You can install as many fixed buttons as you want per post.
But keep in mind that when you install a floating button, for it to work properly you should not use any other buttons.
If you add more than one floating button to a post, none of them will be visible.
In case you also place fixed buttons in addition to a floating button, only the fixed buttons will be visible.
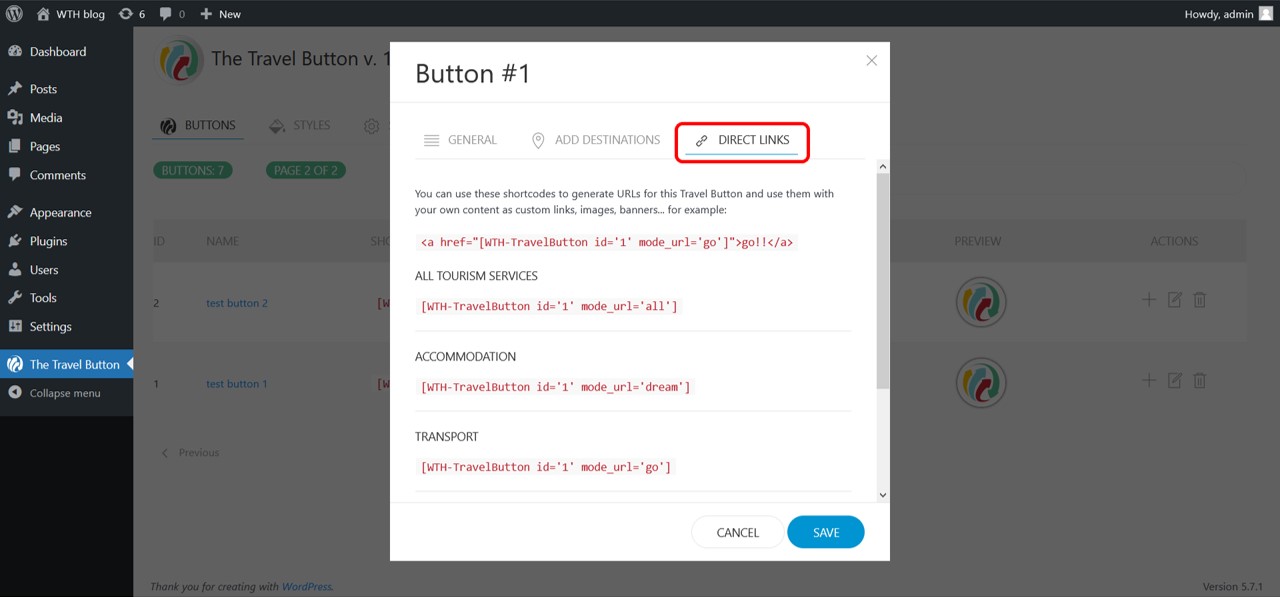
If you rather link our travel search engine with your images, banners, or text, you can do it using direct links. You will find them in a dedicated tab in the button’s customization menu. The direct links are associated with your tracking code and to the destination you have selected for that button.
How to prevent the buttons from showing on your WordPress homepage
If you haven't set up a custom homepage using a static page, your homepage will most likely display your blog entries.
As you add The Travel Button® by We Travel Hub to your posts, several buttons may appear on your homepage.
An inconvenience with a simple solution.
Follow the steps below to prevent The Travel Button® from showing on your homepage
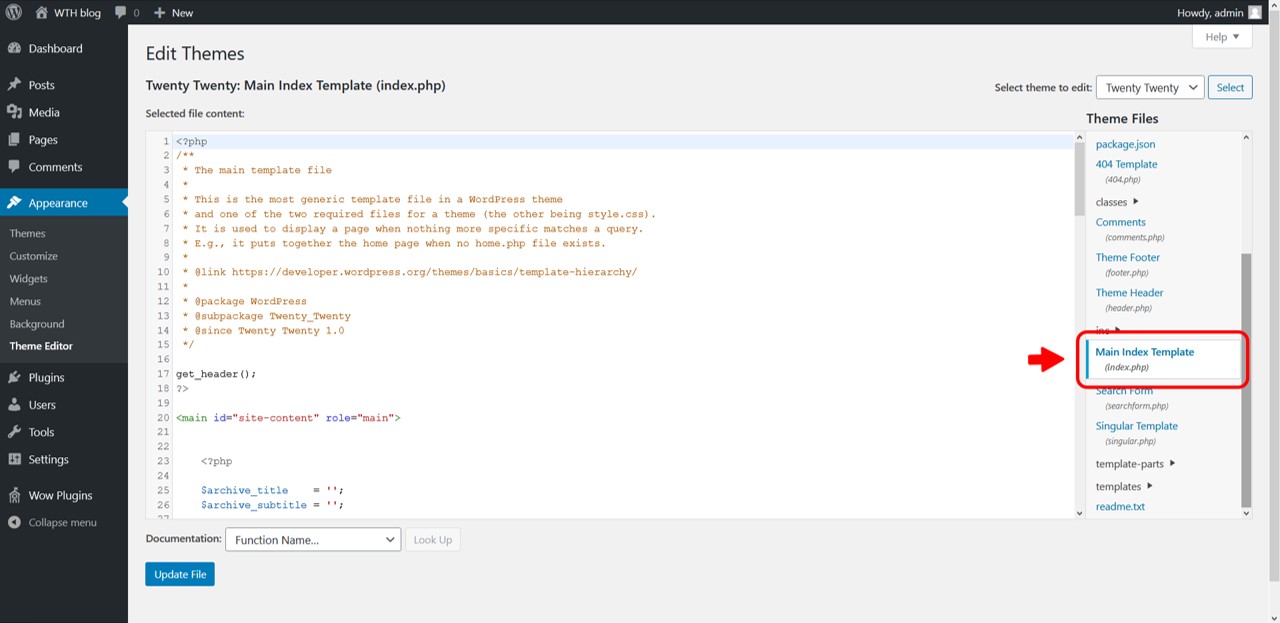
1) On your WordPress Desktop click the ‘Appearance’ tab.
2) Click 'Theme Editor', to access your theme’s style sheet. In this example, we use the twenty twenty theme.
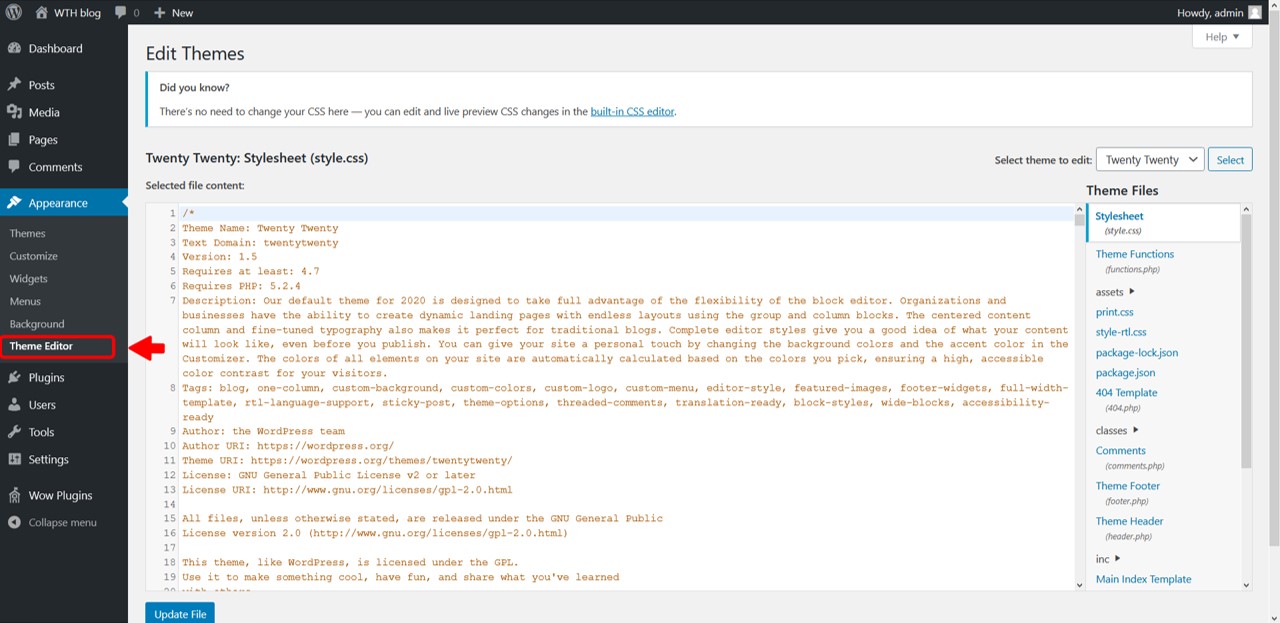
3) Click the index.php tab, in this case, ‘Main Index Template’.
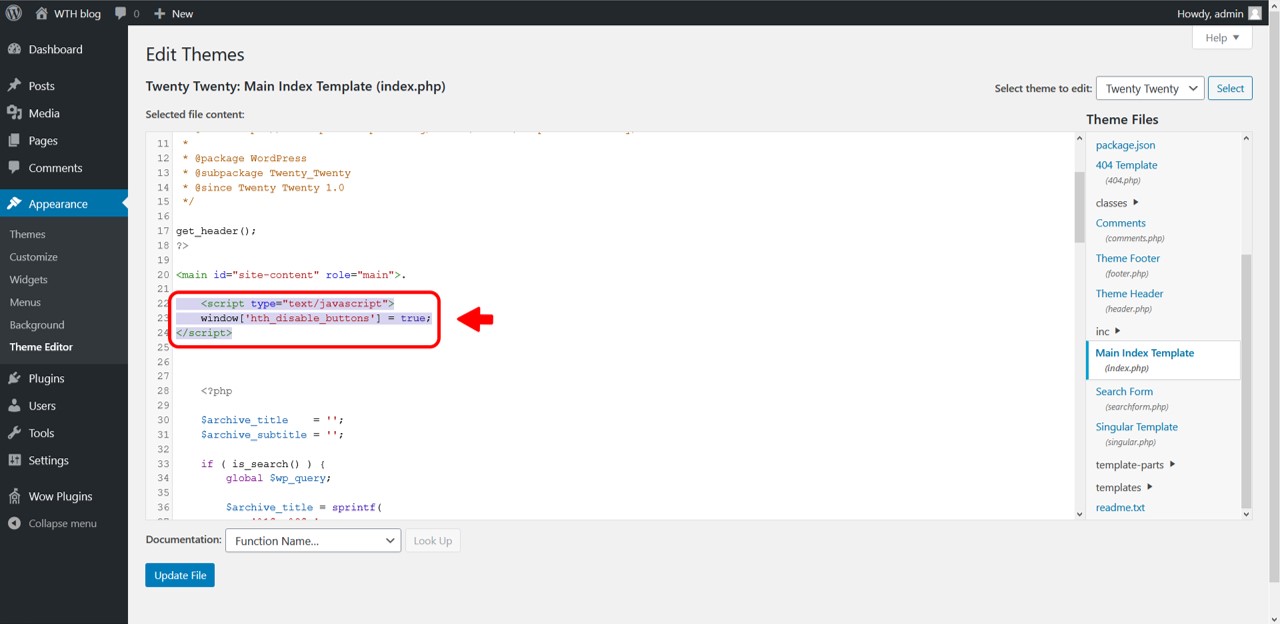
4) Below the first line of code (<main>), paste the following script:
<script type="text/javascript">

    window['hth_disable_buttons'] = true;

</script>
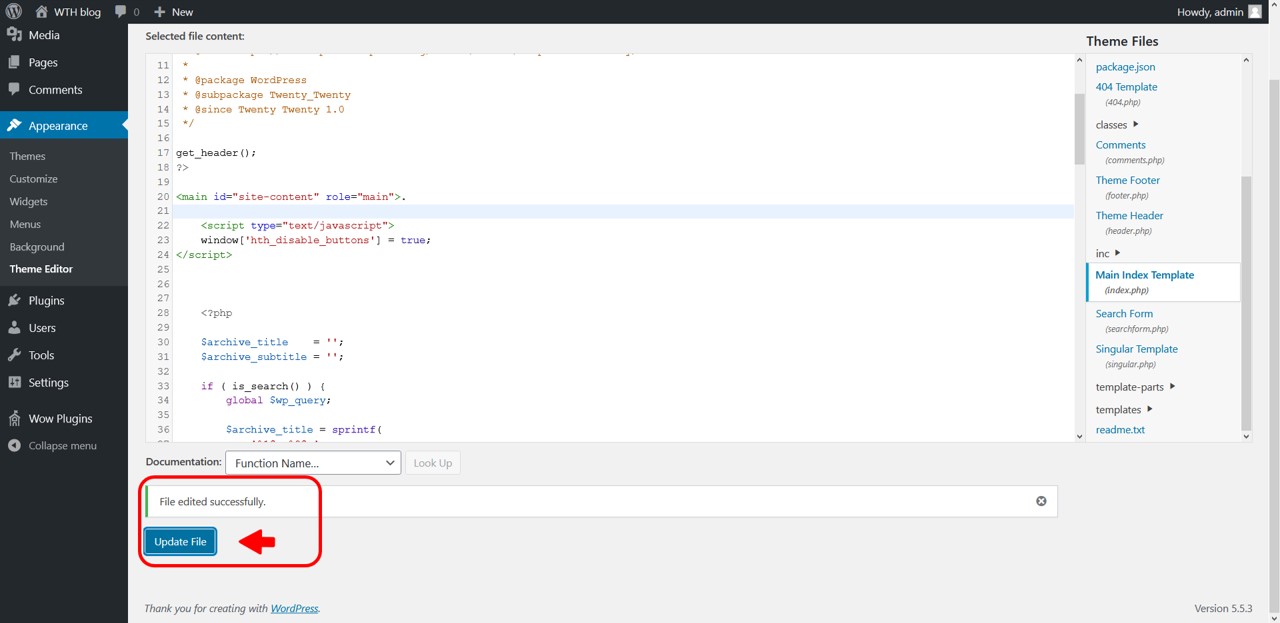
5) Click the 'Update File' button and wait until you see the message 'File edited successfully’.
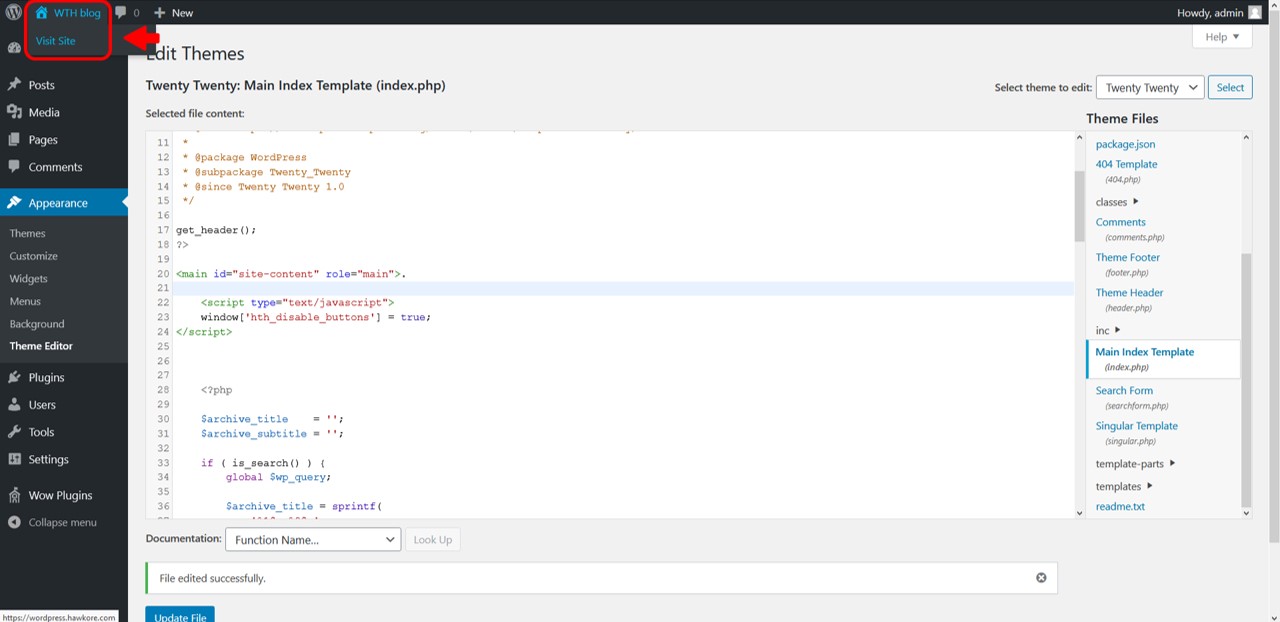
6) Click 'Visit Site', to check that the buttons have disappeared from your homepage.
7) Success.
WordPress best practices warn that we should be careful when editing core files such as the index.php in the template folder. Note that if you update your template, these changes will be overridden, and you will have to re-run the steps described in this tutorial.
Security
Our plugin allows you to control who can manage the buttons and styles you have created, based on their role (editor, author, or contributor).
To access the security settings, click on ‘settings’.
You can manage permissions by clicking the ‘security’ tab.
